I like and hope to be picked to work at my son’s school parties. I always prefer to bring the snack as that’s easy and the kids like just about everything. I get a little nervous when I have to do the craft or the game. I’m not crafty and I’m aways worried they will think my games are lame. Nothing can deflate your ego like a 10 year old kid….just like nothing can inflate your ego like a 10 year old kid!
One of the mom’s backed out of this year’s Christmas craft so when I got the call to cover I scanned Pinterest, asked Max what he would like to do and then headed to Michaels. He has been into origami since reading all the Origami Yoda Series![]() . It’s a non-iPad activity so I like it when he pulls out his books and paper to make his origami Star War figures.
. It’s a non-iPad activity so I like it when he pulls out his books and paper to make his origami Star War figures.
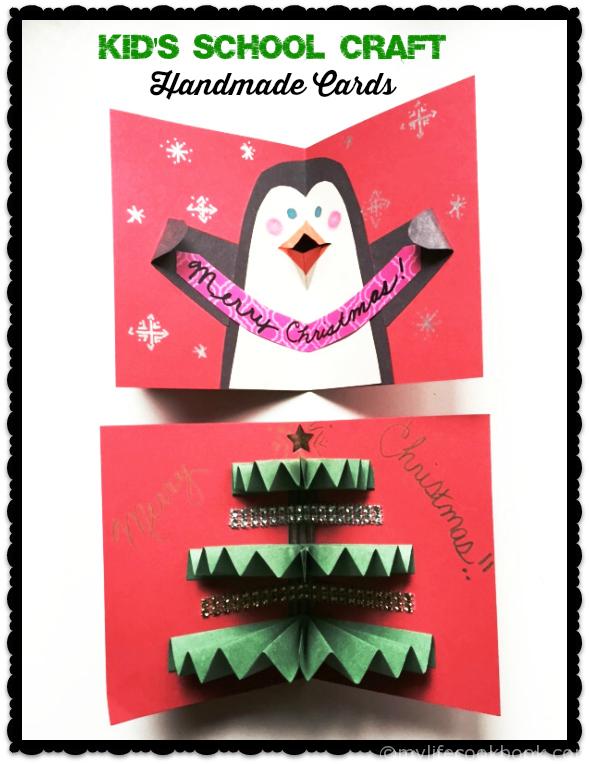
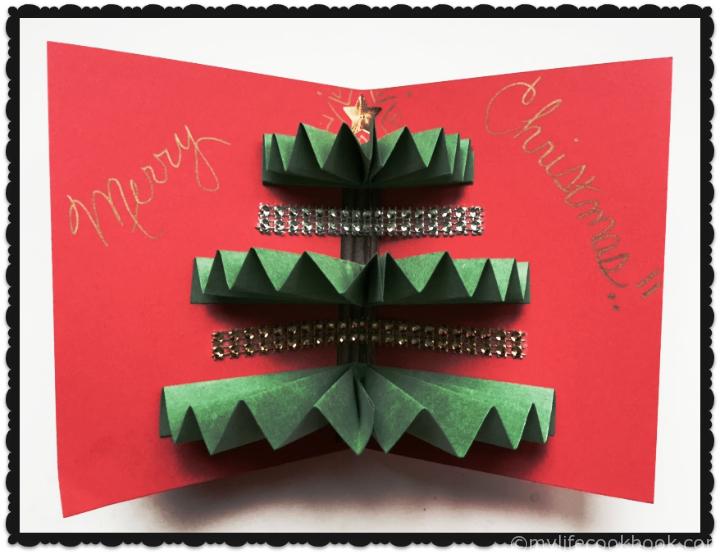
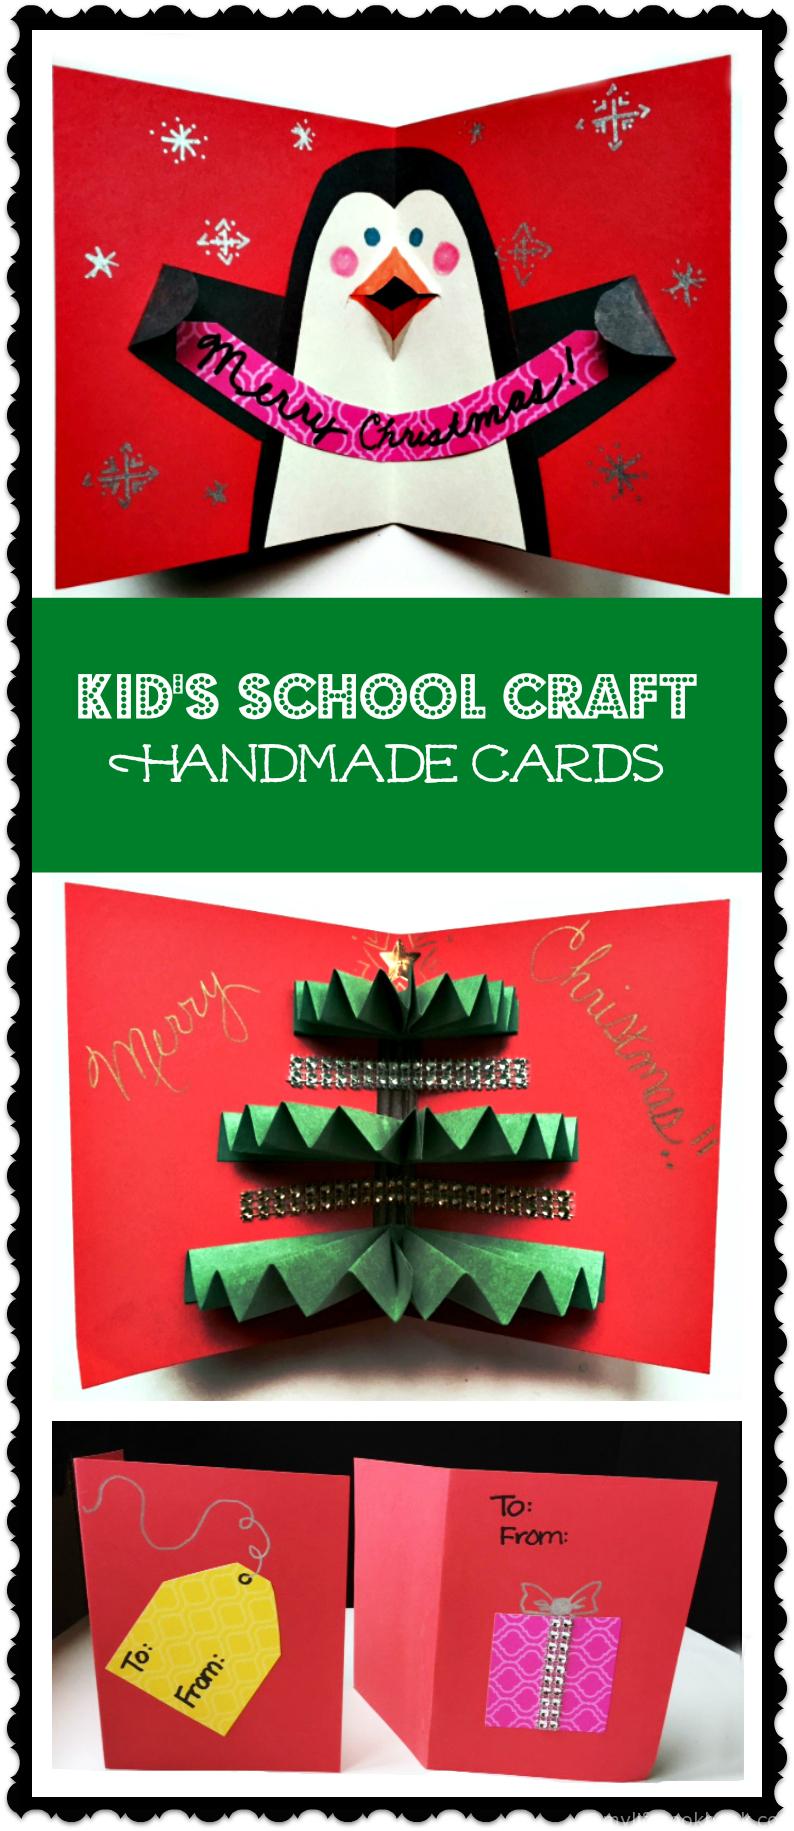
Craft Plan A: Christmas Tree Card
He wanted to make the Christmas Tree card as seen below. I bought all the stuff and collected the rest around my house and we set about making them. Well the construction paper would not stick to the card stock with just a glue stick and luckily I bought a bunch of Scotch adhesive dots ![]() which did work but I didn’t think the kids would be able to do this craft quickly so on to the next idea. If you want to know how to make this Christmas Tree card, click here.
which did work but I didn’t think the kids would be able to do this craft quickly so on to the next idea. If you want to know how to make this Christmas Tree card, click here.
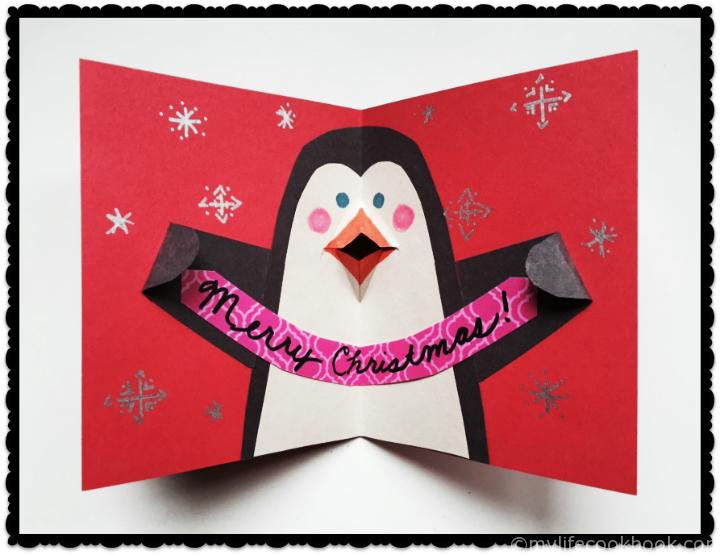
Craft Plan B: Penguin Card
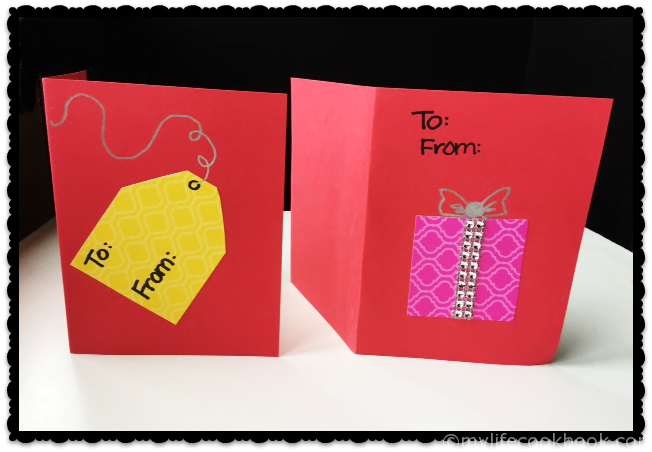
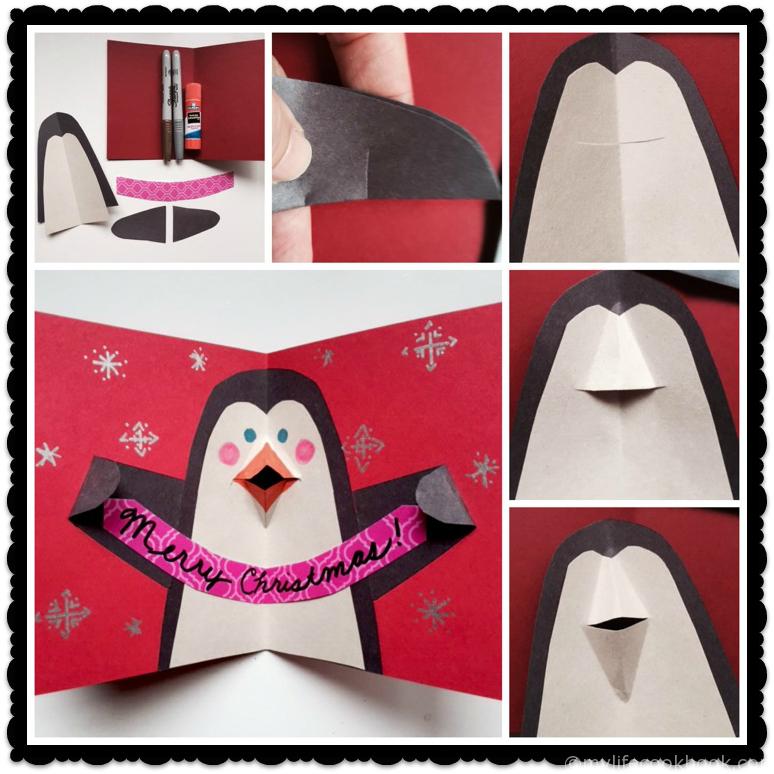
This time Max said he would like to make a card where the inside looks like someone is talking. I learned how to make those when I was a kid and I must have showed him at one time. Great! I can do that. As I sat and pondered what Christmas figure I could make, Max suggested a penguin and this is our final result. There is a lot of ways to embellish this but I decided to keep it simple. They can add any message they want to inside banner and they can fill in the To/From tag on the front (see above). The rest is just gluing and decorating and all can be done with markers and glue sticks! Hurray!
The Penguin Card Directions:
I tried to show a pictorial of what you need.
- First you need to cut out the penguin shape in black and white paper. I cut them together then pared down the white piece and cut the triangle part out at the top.
- Glue the white piece to the black piece.
- Next take both pieces of paper, fold in half lengthwise and cut a slit where the mouth should go.
- This part is a bit tricky. You want to pull out the piece above the slit and fold outward so it looks like the top of the beak.Then you want to do the same with the bottom part.
- Glue the penguin to the card stock in the middle of the page. Fold in half and see if the beak is working properly.
- Glue the fins to each side and then the banner over top. If you have room fold over the end of the fins to look like he’s holding the banner.
- That’s about all….now it’s just about coloring the beak, eyes, cheeks and decorating the rest of your card. Have fun!
If you have any questions, just comment below or if you come up with any other cute creatures, please send me a pic and I’ll post it.


Leave a Reply